Archive for April 2016

Spring Place Mats: Beginner Sewing Project

Share It:

Spring is a time to refresh your space, don't you think?  I had this pretty chocolate brown and pink fabric that begged to be used. So I whipped up some easy place mats to give my spring table a little pizzazz!  This is a great beginner sewing project too.

You will need two pieces of fabric (I used the same for both sides but you could do two coordinating fabrics) approximately 15" x 21" .  The finished place mat will be approximately 14" x 20".  You will also need one piece of iron-on light weight interfacing in the same dimensions.

Iron on the interfacing according to the package directions to the wrong side of one piece of fabric.


Layer your second piece of fabric on top so right sides are facing.  Your interfacing should be face down.  Pin in place.


Sew around the edge of the pieces leaving an opening so you can flip it right side out. I used a   1/2"seam allowance.  Before flipping trim excess fabric and you can clip your corners if you wish. That will give you cleaner corners once flipped.
After flipping it right side out, tuck in the opening's edges and iron everything nice and flat. Then top stitch compleaely around the entire place mat. I used one of my machine's decorative stitches!  Iron your top stitching and that's it!  You are done and you can move on to the next one. You can make 4 in one afternoon, I promise.


And there are only two more days to enter the Cricut Explore Air giveaway!  Hurry!


Cheers!
Jenny

Dishing It! & Digging It! #93

Share It:
Welcome to another fabulous week of inspiration at our weekly Sunday night party, Dishing It! & Digging It!

This week's host is
Jenny


Hi Everybody!! I blog over at

I have a giveaway for a Cricut Explore Air going on right now!  I hope you'll hop over and enter the giveaway!


Now onto features from last week!  We are so impressed with the great ideas you all are linking up!  Thanks for being a part of the party!


Don't these little bites look scrumptious?


There are so many sweet and starry touches in this party!


Nothing feels more beachy than pale blue and seagrass!


Lemons feel so fresh and cheery to me!  This wreath is perfect for spring/summer!


I adore this transformation and the touches of gold give the room sparkle!


Now it's your turn!

Let's get this party started!!


Here's a button for you to use!
the stonybrook house


Remember to pin from the original source please!!

Thanks for linking up!


Win a Cricut Explore Air!

Share It:

Enter the April Cricut Giveaway!


I am so excited to be teaming up with some other bloggers to offer you all a chance to win a Cricut Explore Air cutting machine!  One lucky winner will have a brand new Cricut to create the most beautiful craft projects!  You can enter using the Rafflecopter entry below!  Isn't this exciting??  The winner may be YOU so enter and then share with your friends!


OFFICIAL RULES: Contest ends 4/30/16, 11:59pm EST. Open to US residents only.   1 winner will be chosen. Prize must be claimed within 48 hours of announcement or a new winner will be drawn. Prize is not redeemable for cash. Winner can choose $250 PayPal Cash, OR a the Cricut Explore Air. All entries will be verified. This giveaway is in no way associated with Facebook, Pinterest, Twitter, Instagram, Rafflecopter, Cricut or any other entity unless otherwise specified. Juggling Act Mama and participating bloggers not responsible for delivery of prize. Winner should allow 4+ weeks for delivery of prize. 


Cricut Giveaway - enter to win! Contest ends 4/30/16, see official rules for details.


a Rafflecopter giveaway


Dishing It! & Digging It! #92

Share It:
This week's host is
 photo New Lori 100_zps2lw4mgnc.jpg

Hi Everybody!! I blog over at

I'm so glad you stopped by! You gotta check out all of the awesome links!

Before you scroll on down, let me tell you whats been going on over at my place.
 I am in the middle of a very interesting eating challenge.
It's called The Whole30 Challenge.

It's been going pretty well and I feel fantastic!!
If you want to know more about the Whole30 Challenge click HERE.
This week I shared some of my favorite recipes to keep me going.
You'll have to click over and see all the yummy dishes I've been fixing.

As I said there were so many great link ups! Choosing only 5 was definitely a struggle!
Here are the ones I chose.


Soda Can labels
What? Soda can labels? This looks awesome! Joan is so creative!


Tiramisu French Toast

Even though I can't have these right now.... I'm drooling for anything with coffee in it!
These look amazing!!


Vintage Step Stool Makeover
We had a red vinyl one of these at when I was a kid. These step stools are so cool!
Jenny did a fantastic job updating it.


HOME Shelf
I thought this was so clever and creative!


How to slipcover a recliner
Sarah has crazy sewing skills! Look at how amazing her recliner turned out.


Now it's your turn!

Let's get this party started!!


Here's a button for you to use!
the stonybrook house


Remember to pin from the original source please!!

Thanks for linking up!


Mother's Day Pin Cushion Craft

Share It:
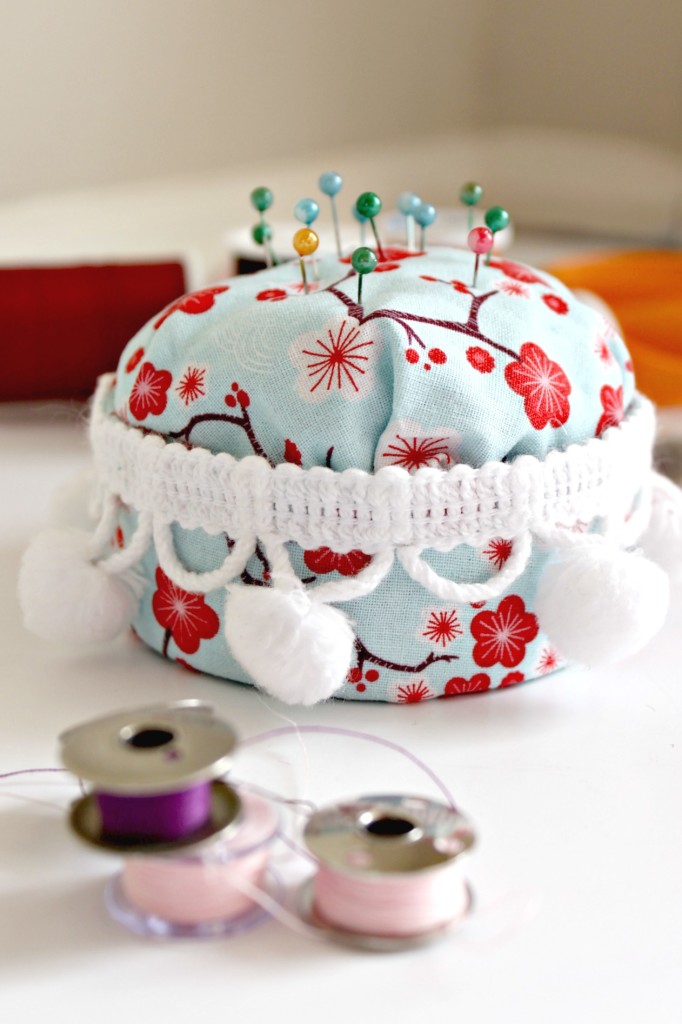
I'm sharing a special Mother's Day craft with you today: a homemade pin cushion!  This pin cushion craft comes with a little story from when I was a young girl.

pin cushion


My kindergarten teacher was Mrs. Mutter. She was the most gorgeous, smartest teacher I had ever seen (although she was the only teacher I had ever seen at that point) and I loved her. She had Farrah Fawcett hair and wore high heels every single day. What more could I have asked for?   And this sweet little pin cushion is the craft she had us make for our mothers for Mother's Day and my mom kept hers on her dresser ever since.  It was easy and I think it would be a great craft to make for teachers, volunteers, crafty friends, or moms!
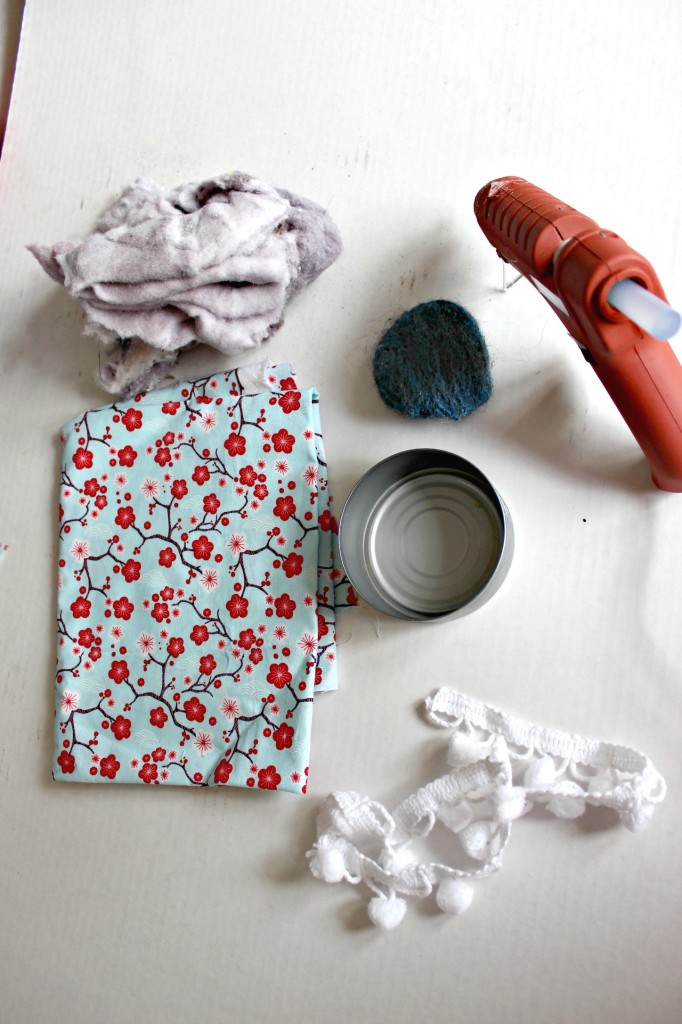
Supplies:
scraps of fabric and trim
clean tuna can, label removed
steel wool
clean dryer lint
glue (I used hot glue but way back when I used plain old Elmer's glue.)

pin cushion1
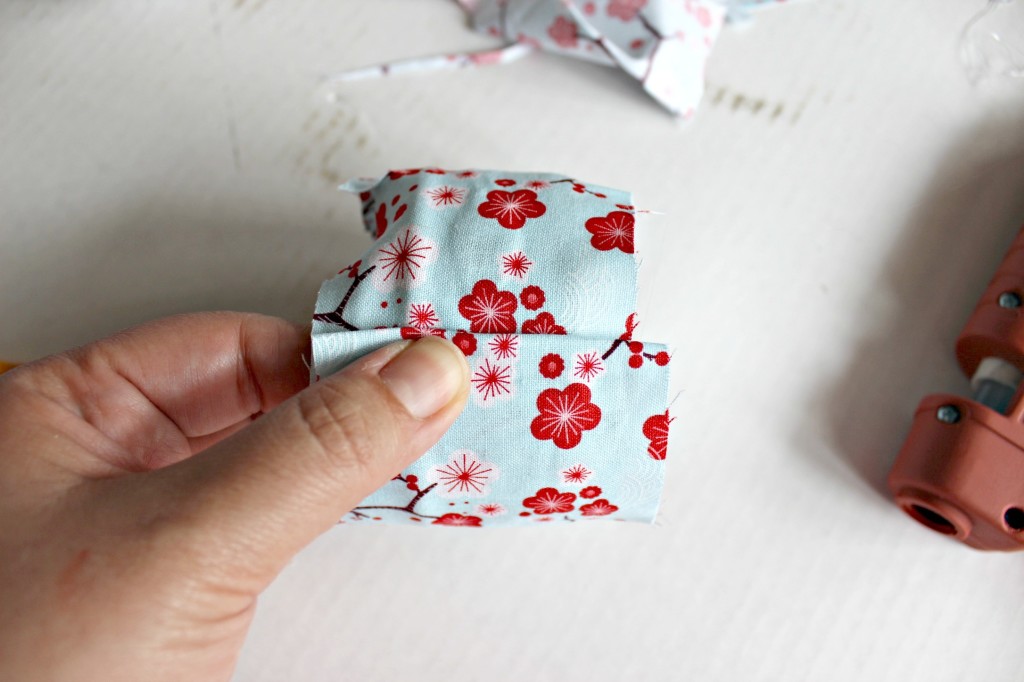
1. Cut a strip of fabric slighty larger than the height and length around the can.
2. Glue the fabric to the outside of the can leaving extra at the top and bottom. Fold the end to make a finished edge and glue.


pin cushion4

3. Apply glue to the inside and tuck the fabric inside. Do the same for the bottom.
pin cushion

4. Cut a square of fabric about 10" x 10" and lay it right side down. Place your steel wool pad in the center.
pin cushion


5. Lay a good-sized wad of dryer lint on top. You will need quite a bit because it squishes down a lot.
pin cushion

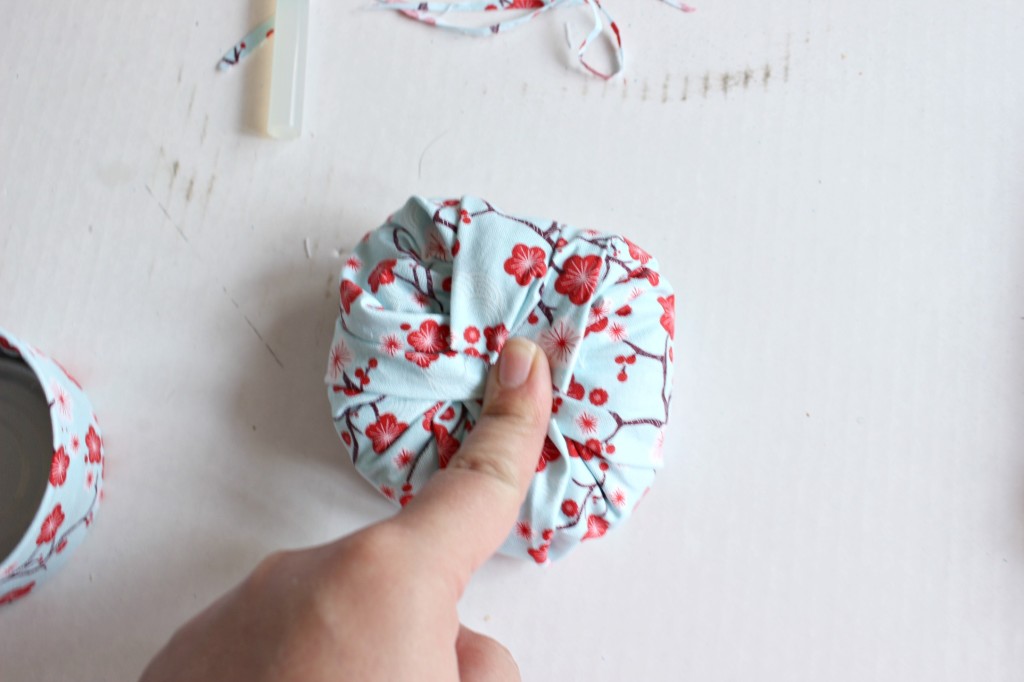
6. Pull up and tuck all the edges to cover the lint.
pin cushion

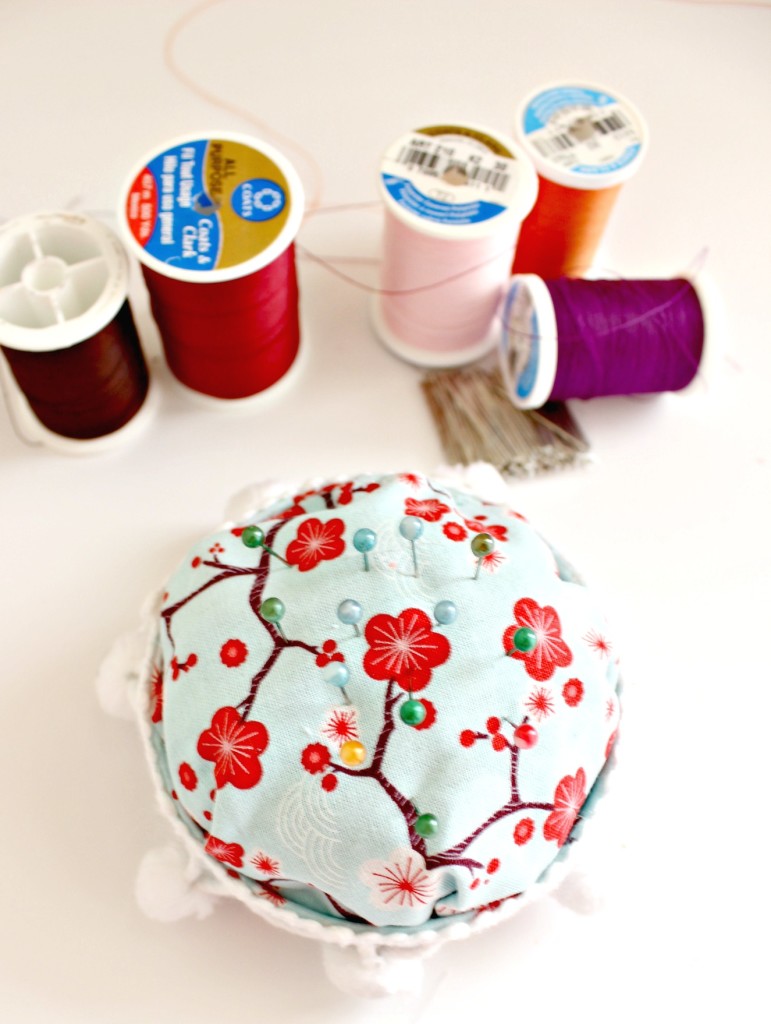
7. Spread some glue onto the inside of the can and plop your lint ball on top. Smoosh the sides in and glue as you go to get the round, taut top you want.  Glue on some trim and you're done! 

pin cushion

pin cushion13pin cushion

Thanks for visiting!

Jenny
Dishing It! & Digging It! #91

Share It:
Logo with headshots It seems like I've been saying I'm waiting for spring to arrive in this area for a few weeks now. But the cold (and occasional snow) continues, so we're still dreaming of gardening instead of doing it. Mentally I'm ready and planning to get my favourite tools out of storage. I shared with my readers a list of my favourite garden tools. essential gardening tools And I started a new series on the blog: Food on Friday. I'll be sharing recipes for you to try this weekend - some new and some old favourites like these Cheesy Twice Baked Potatoes twice baked potato close-up

Now on to the party!!!

The five bloggers who host the Dishing It and Digging It want to thank you for your continued support of our link party! Last week was filled with wonderful spring ideas, gardening tips and recipes. It was so hard to choose the features from the week: DI&DI features banner  
The Anxious Gardener's Tablescape - Olla Podrida
The Anxious Gardener's Tablescape opThe Anxious Gardener's Tablescape op
20160330_120936ecclw-title
tomatoes-054b

image-47

And now it's your turn!!

link party rules

And here's the button to add to your post:
DnD Button link party