Days of Chalk and Chocolate - guest blogs Days of Chalk and Chocolate: guest blogs - All Post
Showing posts with label guest blogs. Show all posts

Double Chocolate Mint Cookies

Share It:
So I came across an old guest post I wrote a few years ago around the holidays and realized I had never shared this chocolate chip cookie recipe on  my own blog.  So here it goes!  Double Chocolate Mint Cookie Recipe (perfect Christmas cookie, by the way!) So without further adieu....

I bet you've been spending a lot of time in the kitchen getting ready for the holidays. I know I have!  And every  year without fail I bake my ultimate favorite Christmas cookie (next to Mallomars which I would never make at home. You can't make Mc Donalds at home and you can't make a Mallomar either but I digress) which are Double Chocolate Mint Cookies. I adore chocolate and I adore mint and I adore cookies. Winning all around!


christmas cookies chocolate chip cookies


Guest Blogger: A Button Tufted Life

Share It:
Hi Chalk and Chocolate Friends!  I'm excited to have Cynthia here today. She blogs at A Button Tufted Life and she is going to give us some great tips on styling today!  Enjoy!

My name is Cynthia, I am a decorator by trade and a newbie design/ lifestyle blogger. I am so pleased to be a guest today at Days of Chalk & Chocolate. I hope you enjoy my post and please stop by and check out my blog: A Button Tufted Life... I would love to hear from you with any comments or ideas!

Guest Blogger: Kelsey from Fancy That Notion

Share It:
I'm so happy to have Kelsey from Fancy That Notion here today to show us some of her favorite projects, including a beautiful and delicious sounding fancy drink!  Thanks for guest blogging today, Kelsey!


Hello there! My name's Kelsey! I blog over at Fancy ThatNotion


Here are a few of our recent projects:


I hope you'll stop by sometime! We'd love to have you:) Also, come check out our shop if you would like!

Today I'm sharing my family's favorite way to cool off during those hot August days:)


In my family, nothing screams summer like a tall glass of "electric lemonade." The delightful mix of raspberries, lemon, and fresh mint (!) is so satisfyingly refreshing, and yet so simple.


Ingredients:

· lemonade concentrate (pink or yellow)

· sprite

· ice

· frozen raspberries

· fresh mint

The exact measurements will just depend on the flavor and texture that you want, but here are some general guidelines to follow:


Put a handful of mint leaves, a handful of ice cubes, a few handfuls of frozen raspberries, half a can of lemonade concentrate, and an eye-balled amount of sprite into a blender. Blend! That's all there is to it. And you have one of the most amazing tastes of summer! Enjoy!:)


It's Jenny again! Doesn't that sound super yummy?  But that peanut butter pie is killing me. I want to eat that right now.

Cheers!
Jenny
Email me if you have a project you'd like featured!  juniper20@gmail.com


Guest Blogger: Confessions of an ADD Housewife

Share It:
Hey everyone!  We had a great time in Ocean City, MD despite Molly having a little stomach thing one night and a sprained knee the day before!  Now we are in the outer banks of North Carolina, my favorite place to be in the summer!  We had a blast last year and it occurred to me that it's my 1 year blogging anniversary!!  I love commemorating it with guest bloggers so here is another one!  Micki from Confessions of an ADD Housewife is giving us a taste (heh heh) of her early blogging days with this delicious sounding chocolate chocolate chip cookie recipe!  Check out all her cool ideas on her blog!  And remember, if you pin anything on this post please go back to her site and pin from the ORIGINAL posting! 


I've been working on perfecting a cookie recipe. I'm not one to reinvent the wheel, so I started with an excellent recipe from Alton Brown. I've been tweaking it for awhile with different types of milk, trying to get just the right richness and softness. I've tried using things to make it healthier, like flax but it wasn't quite the right texture.

Last night, I tried a new combination that hit it out of the park and tastes exactly like the chocolate chocolate chip cookies from Subway...the ones our local shop no longer serves.

So here it is... Please try it and let me know what you think! Next go around I'm going to try mint chocolate chips or maybe mint extract instead of vanilla.

Clone of a Subway Chocolate Chocolate Chip Cookie
  • 2 sticks unsalted butter or margarine
  • 2 1/4 cups flour
  • 1 teaspoon kosher salt
  • 1 teaspoon baking soda
  • 1/3 C dark cocoa powder
  • 1/4 cup sugar
  • 1 1/4 cups brown sugar
  • 1 egg
  • 1 egg yolk
  • 2 tablespoons half and half
  • 1 1/2 teaspoons vanilla extract
  • 2 cups semisweet chocolate chips

Directions

Heat oven to 375 degrees F.
Melt the butter. Sift together the flour, salt, and baking soda and add in cocoa powder. Set aside.
Pour the melted butter a large bowl. Add the sugar and brown sugar. Cream the butter and sugars on medium speed. Add the egg, yolk, 2 tablespoons half and half and vanilla extract and mix until well combined. Slowly add the flour mixture until thoroughly combined. Stir in the chocolate chips. Use a spoon or rubber spatula.
Chill the dough, then scoop onto parchment-lined baking sheets, 6 cookies per sheet. Bake for 14 minutes or until golden brown, checking the cookies after 5 minutes. Rotate the baking sheet for even browning. Cool completely and store in an airtight container.

Guest Blogger: Kelly from A View Along The Way

Share It:
We're having a great start to our vacation!  And I am so happy to have some guest bloggers who are graciously helping me out this week!  Please welcome Kelly!  I'm a huge fan of her blog and her style. Her office is amazing.  Yay for Kelly!  And if you pin any of her gorgeous pictures please please please go to Kelly's blog and pin from the original source!!  Thank you!

Thanks so much for letting me crash your beautiful blog today, Jenny! Think of all of us when you're relaxing and vacationing! I'm Kelly and I blog at View Along the Way about DIY home decor projects, and how we're fixing up our gross ol' foreclosure to feel more like a home. It's not always pretty... and it's definitely not always easy... and it might never EVER be finished... but my blog is a little peek at the View Along the Way.
 Here are a few projects we've taken on to try to make this crusty ol' place start to feel like ours. 1. DIY Upholstered Platform Bed and Headboard I saw this beauty over on Jonathan Adler's website and it was a measly $2500.
Yikes! That was over our budget by oh, about 90 percent. So we got to thinkin'...


and got to workin'...


and came up with this, for under $300.


I love that our bed was a project my husband and I made together. You can see the full DIY upholstered bed tutorial here.

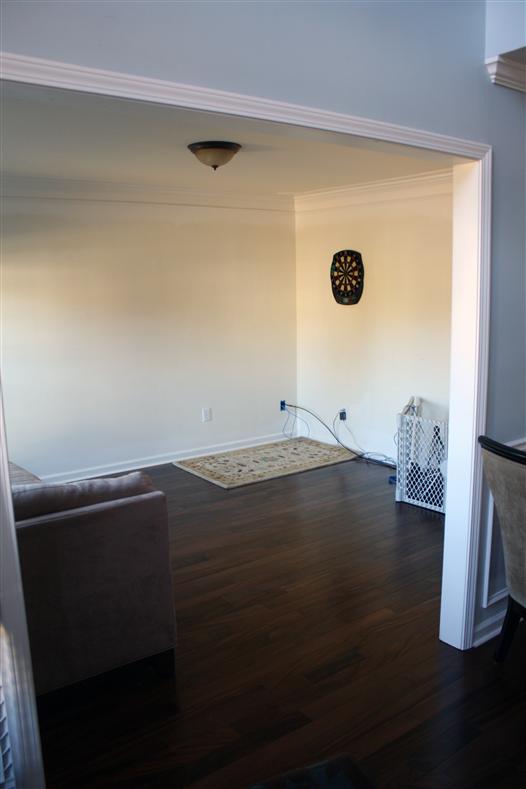
 2. Office Makeover. We have this room. This empty room.


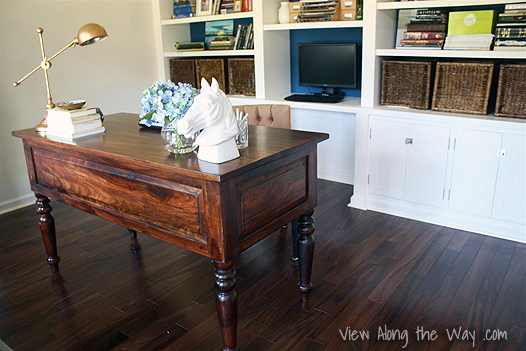
After we bought the house, we removed the popcorn ceilings, added some crown moldings and new (DIY) hardwood floors, and left it this way. And it has sat there, empty for THREE AND A HALF YEARS, until we finally got to work making it functional for us. (Speediness is probably not our strong suit.) My handy husband built this built-in bookshelf wall:


And we JUST found this new (to us) desk from craiglist:


And now we finally have FUNCTION. I can tell you this for sure: function > no function. You can quote me on that. We still want to add some DIY lighting, a rug, art and window treatments, but I'm loving it so far.  

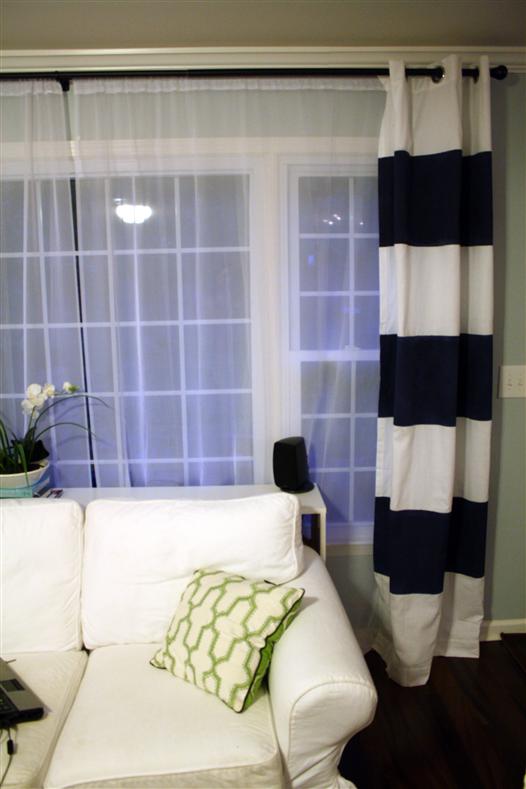
3. DIY Curtains Let's just put it this way: no one has ever asked me to sew something for them. I am TERRIBLE and have not the slightest idea what I'm doing, ever. So my first attempt at DIY curtains was just to paint these pre-made panels I picked up:


(You can see the striped painted curtain tutorial here.) But then I started getting cocky. Started thinking that I would never have to buy curtains AGAAAAIN!! Because I learned how to sew a straight line, even if that "straight line" is not usually actually straight. So I got to work sewing these lined back-tab curtains for my master bedroom:


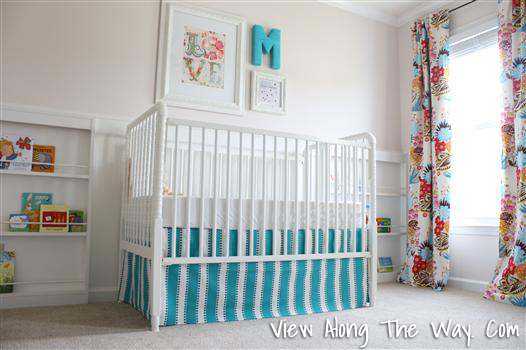
And then for my daughter's nursery:


I posted on how to sew lined back-tab curtain panels here. Are they perfect? No. Are they CLOSE to perfect? Um... also no. But they are functional, and they sure are cheaper than custom curtains! I'll take it! We still have a LOOONG way to go to make our house the way we envision it, but I'm having so much fun on the journey, and I hope you'll join me!

You can subscribe to the blog here, and follow me on facebook, twitter or pinterest. Hope to see ya over there!

Calling Guest Bloggers and Friday Link Party

Share It:
One of my greatest talents is being able to leave the most important stuff to the last minute. Jim adores this quality in me.  Like the time we were almost late to his class reunion because I was at the mall exchanging a skirt. Or the time we missed out on some of my disability insurance payouts because I waited too long to call and tell them I gave birth to Molly. Oh good times, good times.  Well, here I go again!

I'm going on vacation on Saturday for a week. I'll have my computer but I doubt I'll have much to post about while I'm carousing in the outer banks of NC. Sooooo, if you are interested in being a guest blogger for next week (August 12-20th) let me know!  I'd love to have you.  Just send me an email to juniper20@gmail.com and send me the HTML. Your post can be a recycled old post that you are especially proud of or something new.   Thanks!

Now, onto this week's Latest and Greatest Friday Link Party!


Guest Blogger: Breida with a B!

Share It:
Hi. My name is Jennifer and I'm a chalk addict.  I must paint everything with chalkboard paint so I can then write on it with chalk.  And it's an addiction I refuse to give up!!  Yay for Breida with a B for giving us all another way to use chalkboard paint!  I am so happy she is sharing her sweet tags with us today and she is so so nice too. Head over and visit her!  And if you want to be a guest blogger please email me!  Juniper20@gmail.com!


Hello there! Let me introduce myself. My name is Breida. With a B. I am terribly excited to be guesting here at Days of Chalk & Chocolate. This is my very first guest post and I want to thank Jenny for the opportunity. I'm hoping to do a lot more of this in the future and I can say it all started here! I hope you will all come over and visit with me at breida with a b. I'm crafting, painting, gardening, cooking, and trying to take pretty pictures of it all! Join me!

I decided that my post for Days of Chalk & Chocolate should be either about chalk OR chocoalte. . . and since there wasn't any chocolate in the house (gotta fix that), I thought up this simple and versatile craft project. You could do this for any holiday or gift giving occasion but since Mother's Day is coming up very soon - that's the theme I went with.

Erasable chalk tags . . . for any occasion - but you know moms eat this stuff up!

This project is very simple and can even be done by the kids with one minor variation. Here are the materials you will need:

Crayola Model Magic - I love this stuff!


shipping tags and baker's twine - more of my favorites. . .


my NEWEST favorite!! chalkboard paint!


You will also need, chalk, a sharp knife (or a cookie cutter-for the kids), a straw, and a rolling pin.
I have done other cookie cutter projects with Model Magic in the past. It's very easy to work with. Here, I simply rolled out a small piece on the back of a cookie sheet and then lightly pressed the shipping tag into the surface to make an impression. If you press too hard or leave it too long you won't be able to get it back off without wrecking the shape. It took a couple of tries before I got it down but then it was quite easy. Once the imprint of the tag shape is made, use the sharp knife to cut out your shape. Don't make any sawing motions - just press the knife straight down. The imprint will include the hole for the string. A standard drinking straw is just the right size to remove the Model Magic where the hole should be. Just press it straight in and if you get lucky the excess will be stuck in the straw when you remove it. If not - you will need to pluck it out with tweezers. Do all of this directly on the back of the cookie sheet. Once you get your shapes cut out you can't move them till they are dry. (about 24 hours). Don't worry, they don't stick to the pan. Once they are dry they will come right off. Put them aside and resist the temptation to poke them. They are not cookies and you don't want fingerprints on your tags!


They look like they should go in the oven now but there is no cooking involved!


All ready to paint. you can see the imprint of the shipping tag - looks like a real tag!


The next step is the most dramatic. I painted these with the brush-on type of Rustoleum Chalk Board Paint because I have a lot of it. A lot. Really. Do you need some? I do, however, think that the spray-on type would work even better. I used a sponge brush but even that left a good deal of texture on the surface of the tag. When the Model Magic dries it is very smooth and I think the spray chalk board paint would keep it that way. 

After I painted them - two coats - and let them dry, I just looped the baker's twine through the hole and the tag is complete. All that's left is deciding what you want to attach it to and what you want to write on it. The tags can be written on with chalk and erased so that you can use them again and again. I'm very pleased with how they came out. The lilacs are from my yard and they are usually blooming for Mother's Day. Everything is a bit topsy-turvy this year. The lilac's will be long finished in another two weeks but I'll still have my erasable chalk tags! 


Here are a few more examples of the finished product:


I'm so happy to be able to share this simple chalk craft here with you at Days of Chalk & Chocolate. Many thanks to Jenny! Please come by and visit me at breida with a b. I'm having a wonderful time sharing my experiences with all of you! Thanks!

New Year's Eve Ideas!

Share It:
Hello everyone!  I guest blogged at Type A Decorating about New Year's Eve and this is my blog post!  Go check out Tammy's site to read other guest bloggers.
The wrapping paper is in the garbage, the yule log has turned to ashes, Daddy's twice a year church obligation has been met...Christmas is over. I hope you all had a beautiful and blessed holiday!  Let's look forward to an even better 2012 Here are some ideas to get your party on!

Look at these beautiful party and table decorations!  Of course a glittery theme is best for ushering in the new year!


Martha shows a great way to use up the leftover gift wrap!  These look like sparkly icicles to me.


This table setting is chic and shiny at the same time. I had mint julep cups at my wedding so I always like seeing them on a table setting.


I love the idea of using clocks as decor for New Year's Eve.
Gorgeous decorations for cupcakes!  So festive!
More metallics!  I bet we can scam some glittery stars left over from Dollar Tree like the one I bought for Christmas decorating.
Design Indulgences

 
Don't forget the champagne! You can have it in a glass....

or in your cupcake.
Aqua, black, and silver?  Yes, please!

I hope you glean a little inspiration from these ideas and have yourself a sparkly, shiny, and Happy New Year! And thanks, Tammy, for letting me visit today!

Cheers!
Jenny